Girls Night Hosting Guide: Charcuterie Boards, Clay Magnets & a DIY Mocktail Bar
When you’re building community—whether you’re the new girl in town or have lived somewhere your whole life—creating intentional spaces to gather matters. Last summer, I had been living in Orlando for over a year, yet I still felt like there weren’t many opportunities for the young women in my community to simply get together. So I started dreaming (and, of course, Pinterest-ing) about what that could look like.
As I planned the evening, I had three goals in mind.
First, keep it easy. I wanted the night to feel low-effort for both me and the girls coming. When hosting is simple, it removes barriers that might keep people from showing up and allows everyone to focus more on the company than the event itself.
Second, keep it fun. The women coming were in very different seasons of life—some moms, some fresh out of college, some young professionals—and many of them didn’t know each other very well. I knew having an activity would make it easier to relax, laugh, and start conversations naturally.
Third, keep it intentional. This is always my goal when hosting. Even while keeping things simple, I wanted the space to feel thoughtful and welcoming—like a little girls’ getaway for the evening. Some of these women were arranging babysitters or carving out time from already busy schedules, so I wanted it to feel special and worth it.
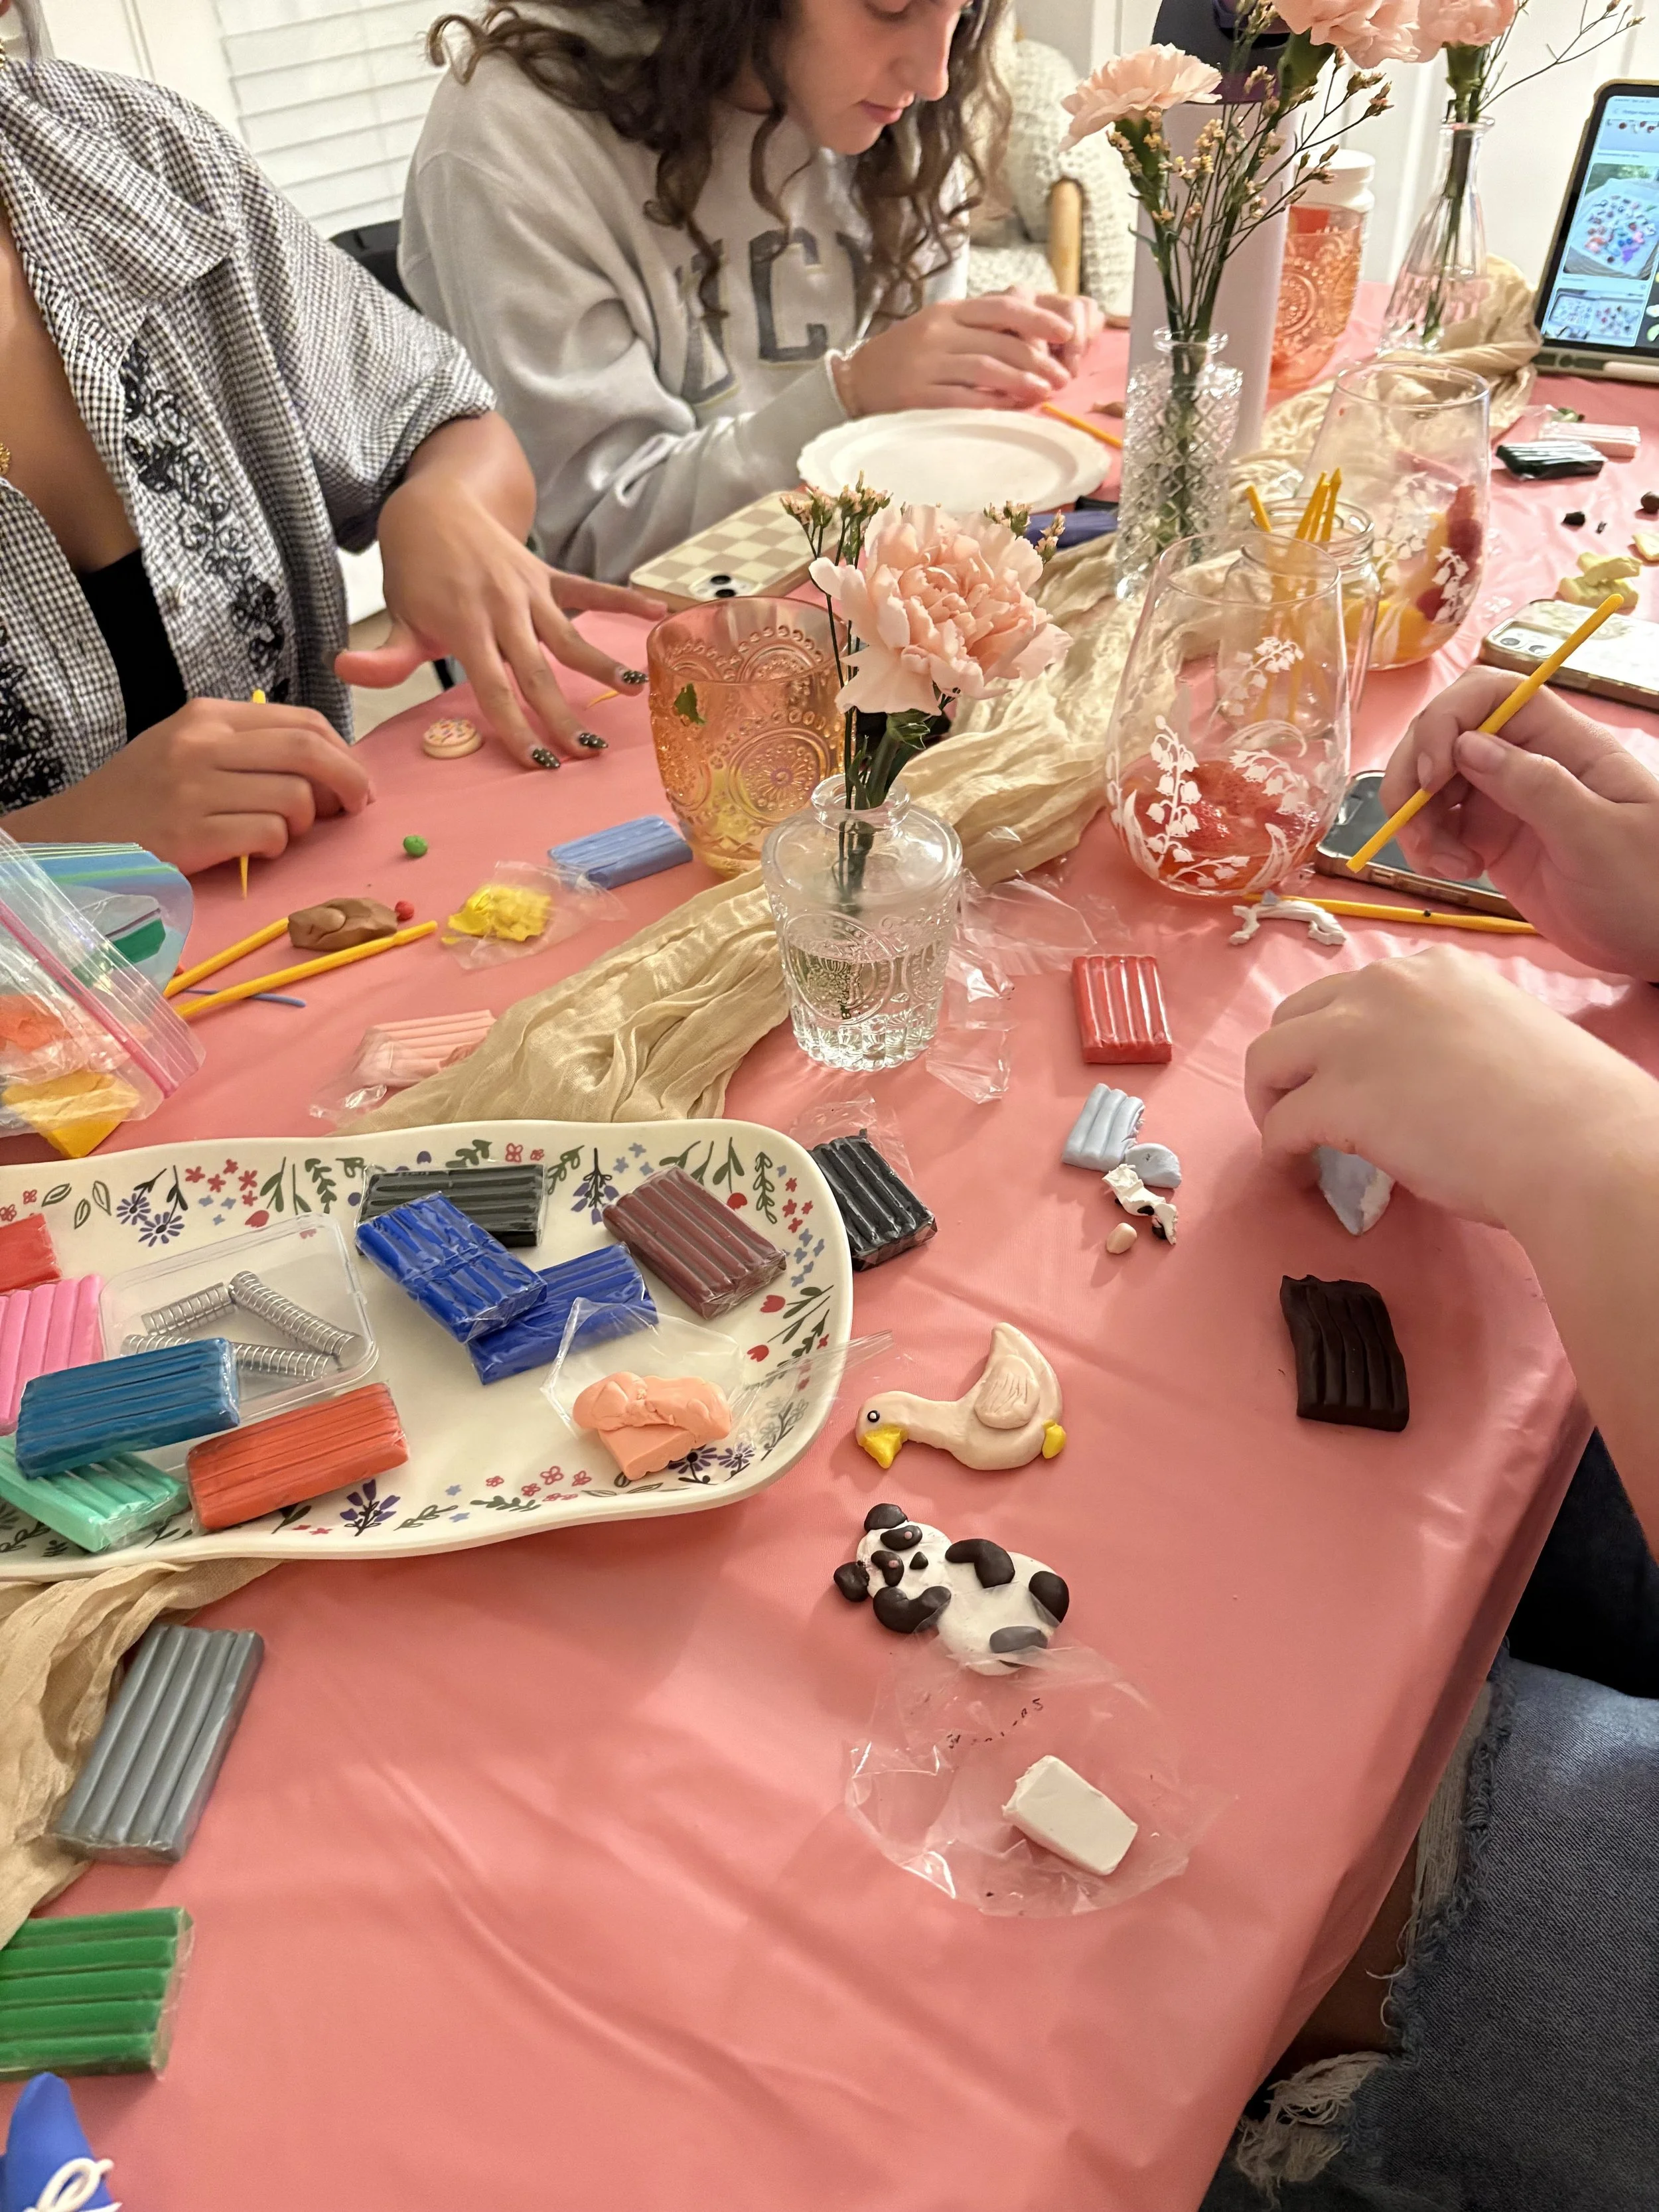
To bring those three goals together, I decided on a Craft & Charcuterie Girls Night. Each guest brought their own themed charcuterie board to share, and for our activity we made clay magnets together. As a bonus, I set up a simple DIY mocktail bar, which ended up being a huge hit and surprisingly easy to put together.
Keep reading to see how it all came together—and why these elements made the night so fun and effortless to host.
What you’ll find in this post:
How to host an easy girls night
A “bring your own board” charcuterie idea
DIY polymer clay magnets craft
How to set up a simple mocktail bar
Practical hosting tips for a stress-free night
The Food: Bring your own Board
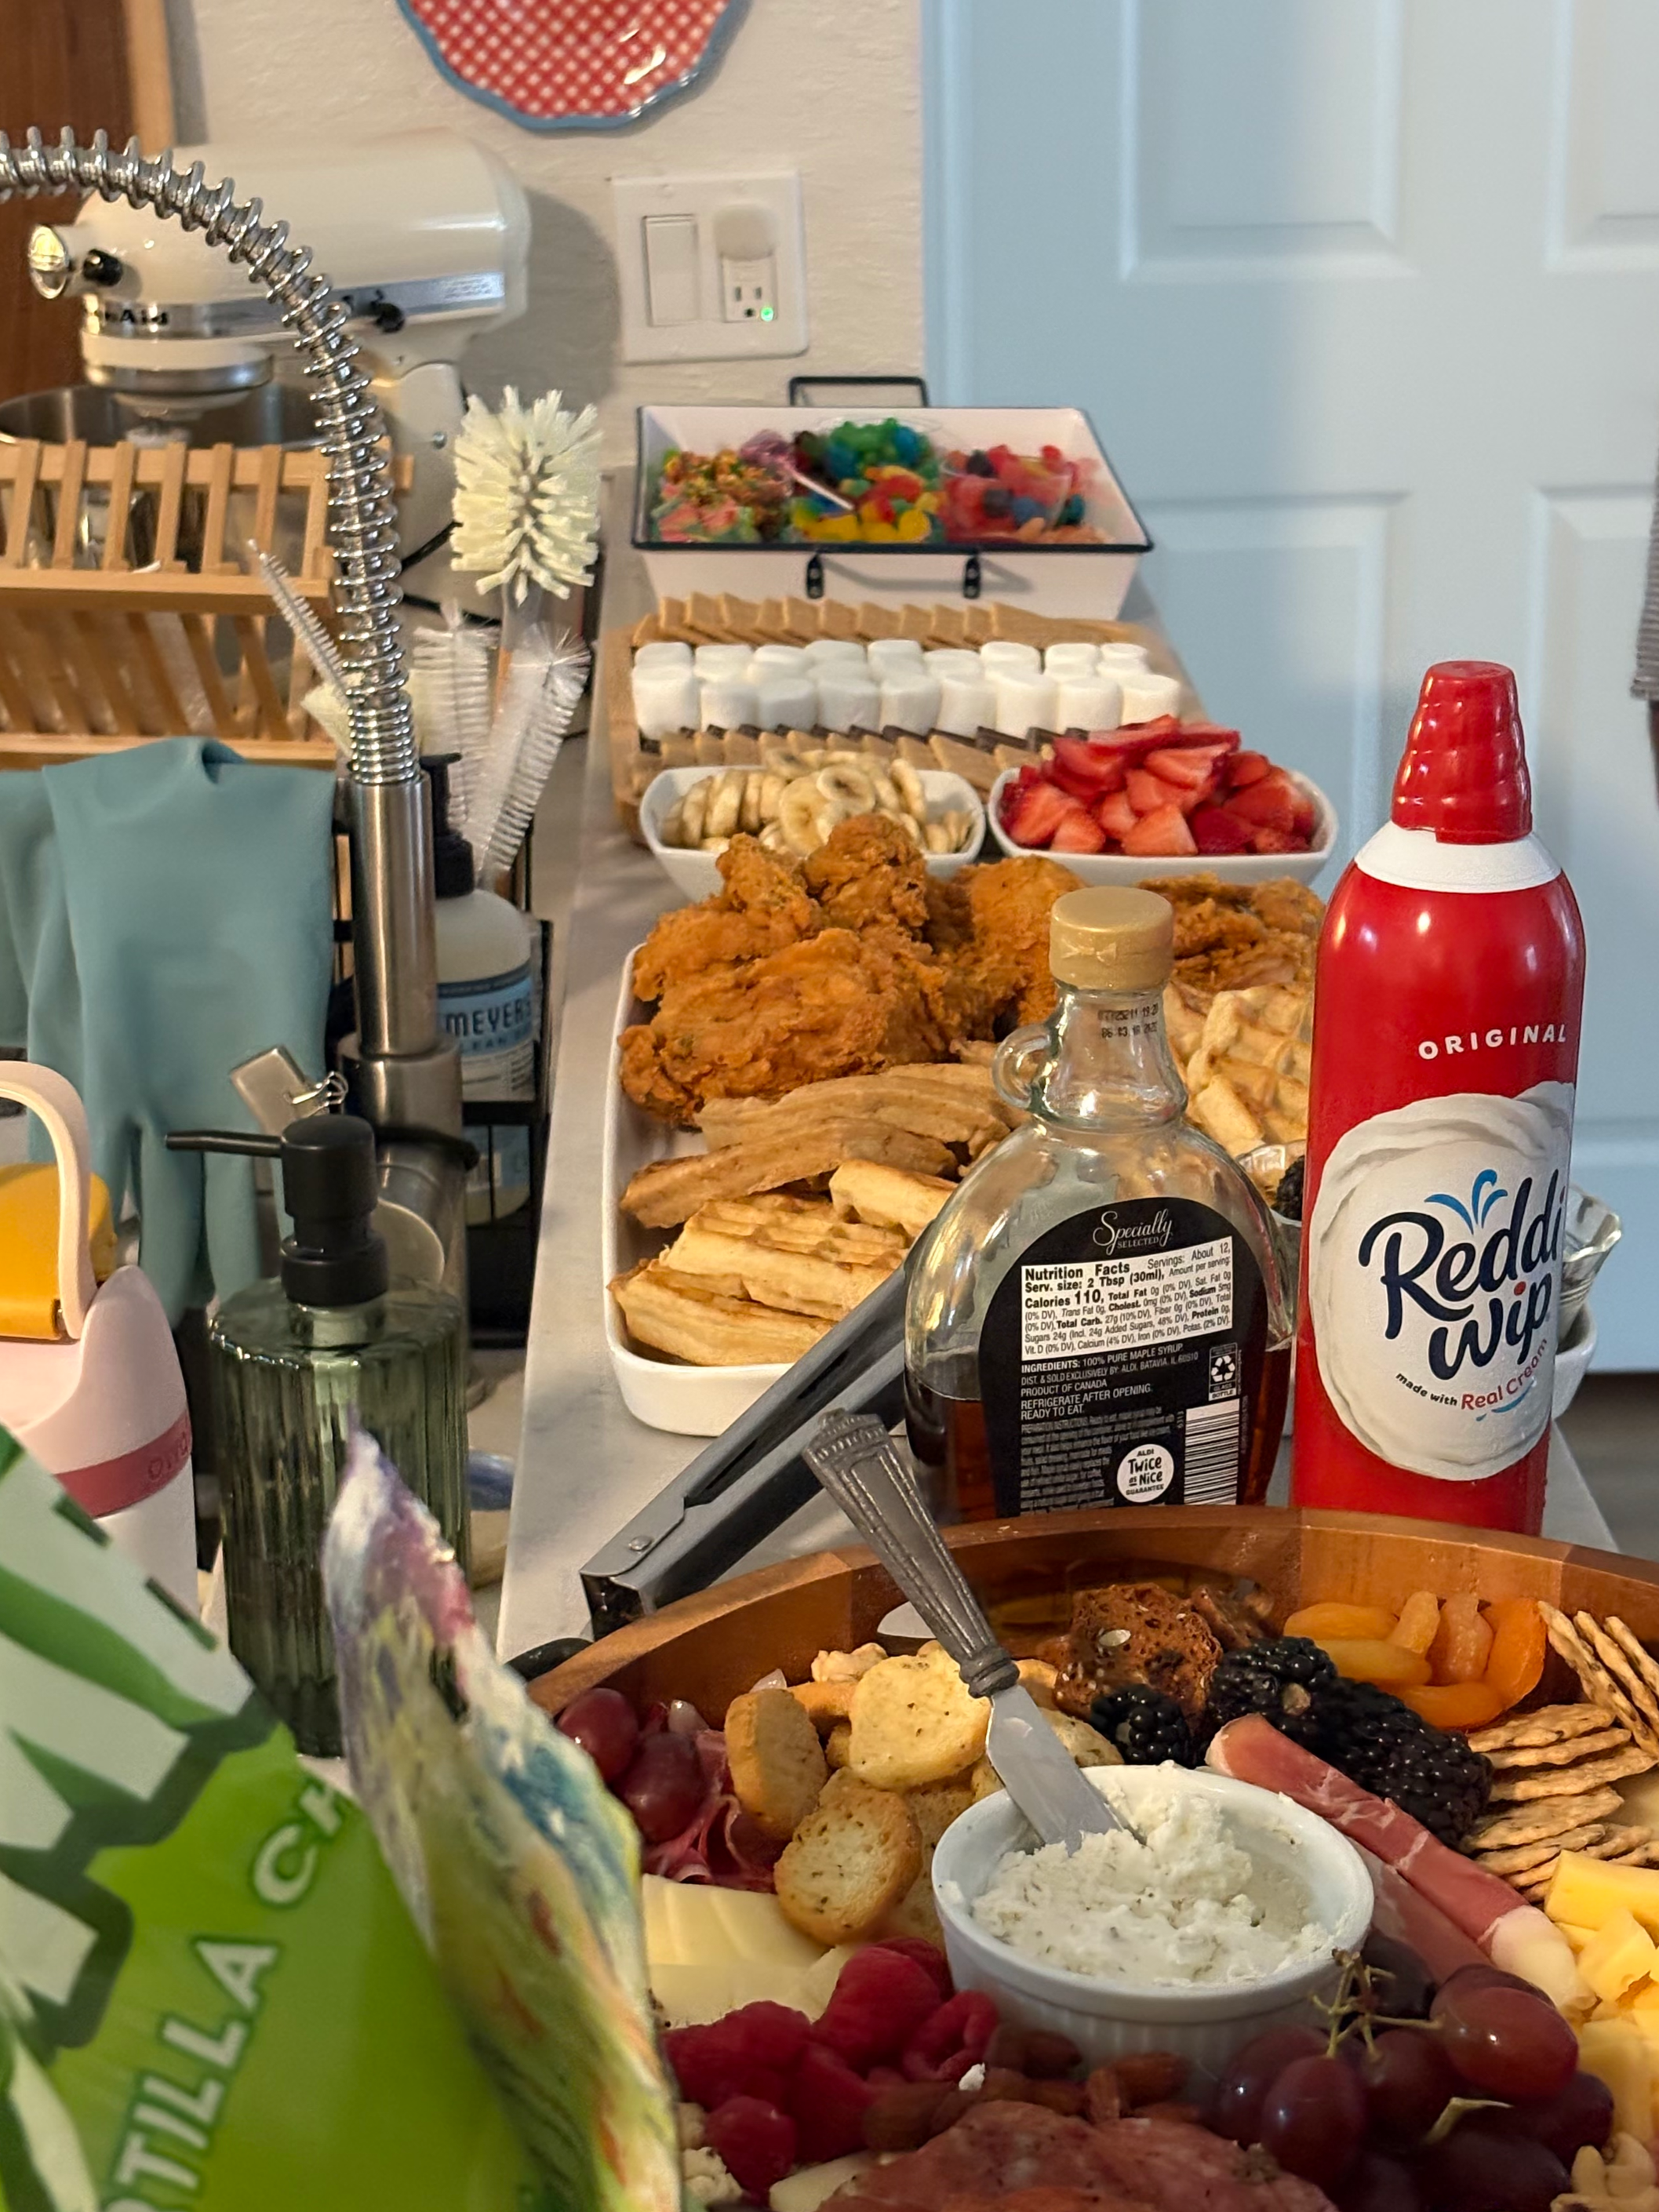
I don’t know where I first saw this idea to do a “bring your own board” night but the moment I saw it, I knew I had to do it at a girls night! It was the perfect element for this girls night because it took the pressure off of my time and finances to feed everyone and it meant that each girl could invest as much or as little time and money as they wanted into this! Want to go all out with a classic meat, cheese, and fruit board with fancy salami roses and smoked gouda…AWESOME! Want to buy some chips, salsa, and guac and throw it on a platter…PERFECT! Here is how I did it from start to finish!
First, I texted the girls WAY ahead of time so that they had plenty of room to plan and prepare. Here’s an example of what I texted:
“Hey girls! Looking forward to our Girls Night coming up. I thought it would be fun if I provided some fun drinkies and you guys paired up with one of the other girls to bring a board of a theme of your choosing! Wanted to throw that out there now so anyone who is coming has plenty of time to coordinate and brainstorm. Once you find a partner and decide on a charcuterie board theme. text it in here so we don’t end up with all chocolate boards or something (not that I would be mad at that…). Can’t wait!”
Two things to note here: (1) I had let them know about a month out the date, time, and place of Girls Night so they could block out their calendars and this was simply a follow up of details (but this was still about two weeks out), (2) Letting them have the option to partner up took the financial burden off of them, provided a space for them to connect before the girls night, and meant we wouldn’t have WAY too much food the night of!
*Hosting pro-tip: Don’t wait until you have all the details figured out to communicate about your event. More often than not, people will need to block off the time in their schedules long before you have all of the details sorted out. Do your guests a favor and give them a “save-the-date” first and details later!
Next, as we got closer, I sent them some inspo from Pinterest. I think it is important not to expect all of your guests to be on the same page as you. Just because my Instagram and Pinterest feed were flooded with build-your-own-board ideas, does not mean that your guests know what you are talking about. So I just sent a few links their way to communicate the vision to make sure no one was left feeling confused.
Finally…I left them alone! The Type A, controlling host that I am often wants to micromanage and make sure that the vision I have is achieved. When you do this, it not only stresses you out more but puts unrealistic expectations and unnecessary burden on your guests. And guess what? It turned out PERFECT! Not only was it delicious, but it actually functioned as the perfect icebreaker for the gathering. As each girl came in, they were so excited to introduce us to their board alongside their partner. If I was rating this trend, I would give it a 10/10!
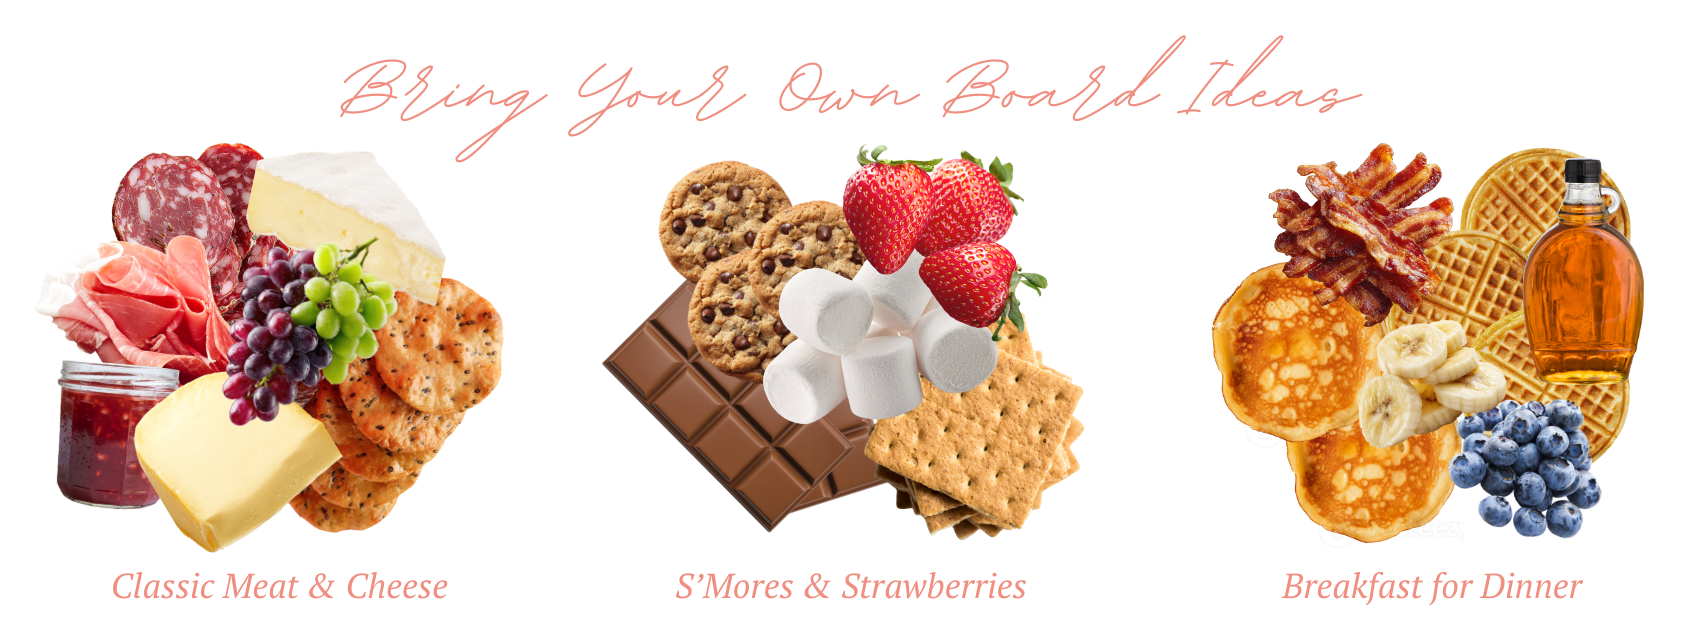
Check out these ideas for board themes below!
Charcuterie Board Essentials
We know that I am all about using what you have when it comes to hosting! However, there are some staples that I think are worth investing in for the long-term when it comes to charcuterie boards:
A charcuterie board! Well…of course! This charcuterie board is especially great because of the lid that snaps onto it making it easily transportable but also not impacting the look of the board when the lid is off.
Ramekins! I have these exact ramekins and they are perfect for putting adding some sweet preserves or jam to a savory board. Or…if you are getting creative with a Breakfast Board like the one above, you can put some syrup or blueberries in them!
Cheese knives! I couldn’t find the exact ones I have but these are the same shapes as the ones I have. I don’t think you need these but they definitely are useful without ruining the aesthetics.
The Activity: Making Magnets
I have always loved the idea of a girls craft night but have always struggled to find an activity that doesn’t break the bank and is also something that is beginner-friendly (important to remember that not all your guests have the same hobbies as you). Making polymer clay fridge magnets was the perfect solution to this! Not to mention, I loved the idea of crafting something that people would actually use—maybe it’s just me but I feel like I can always use more magnets for my fridge. Despite all this, I feel like this is a craft that you can easily overcomplicate so here is everything you need and exactly how I executed it!
What you need:
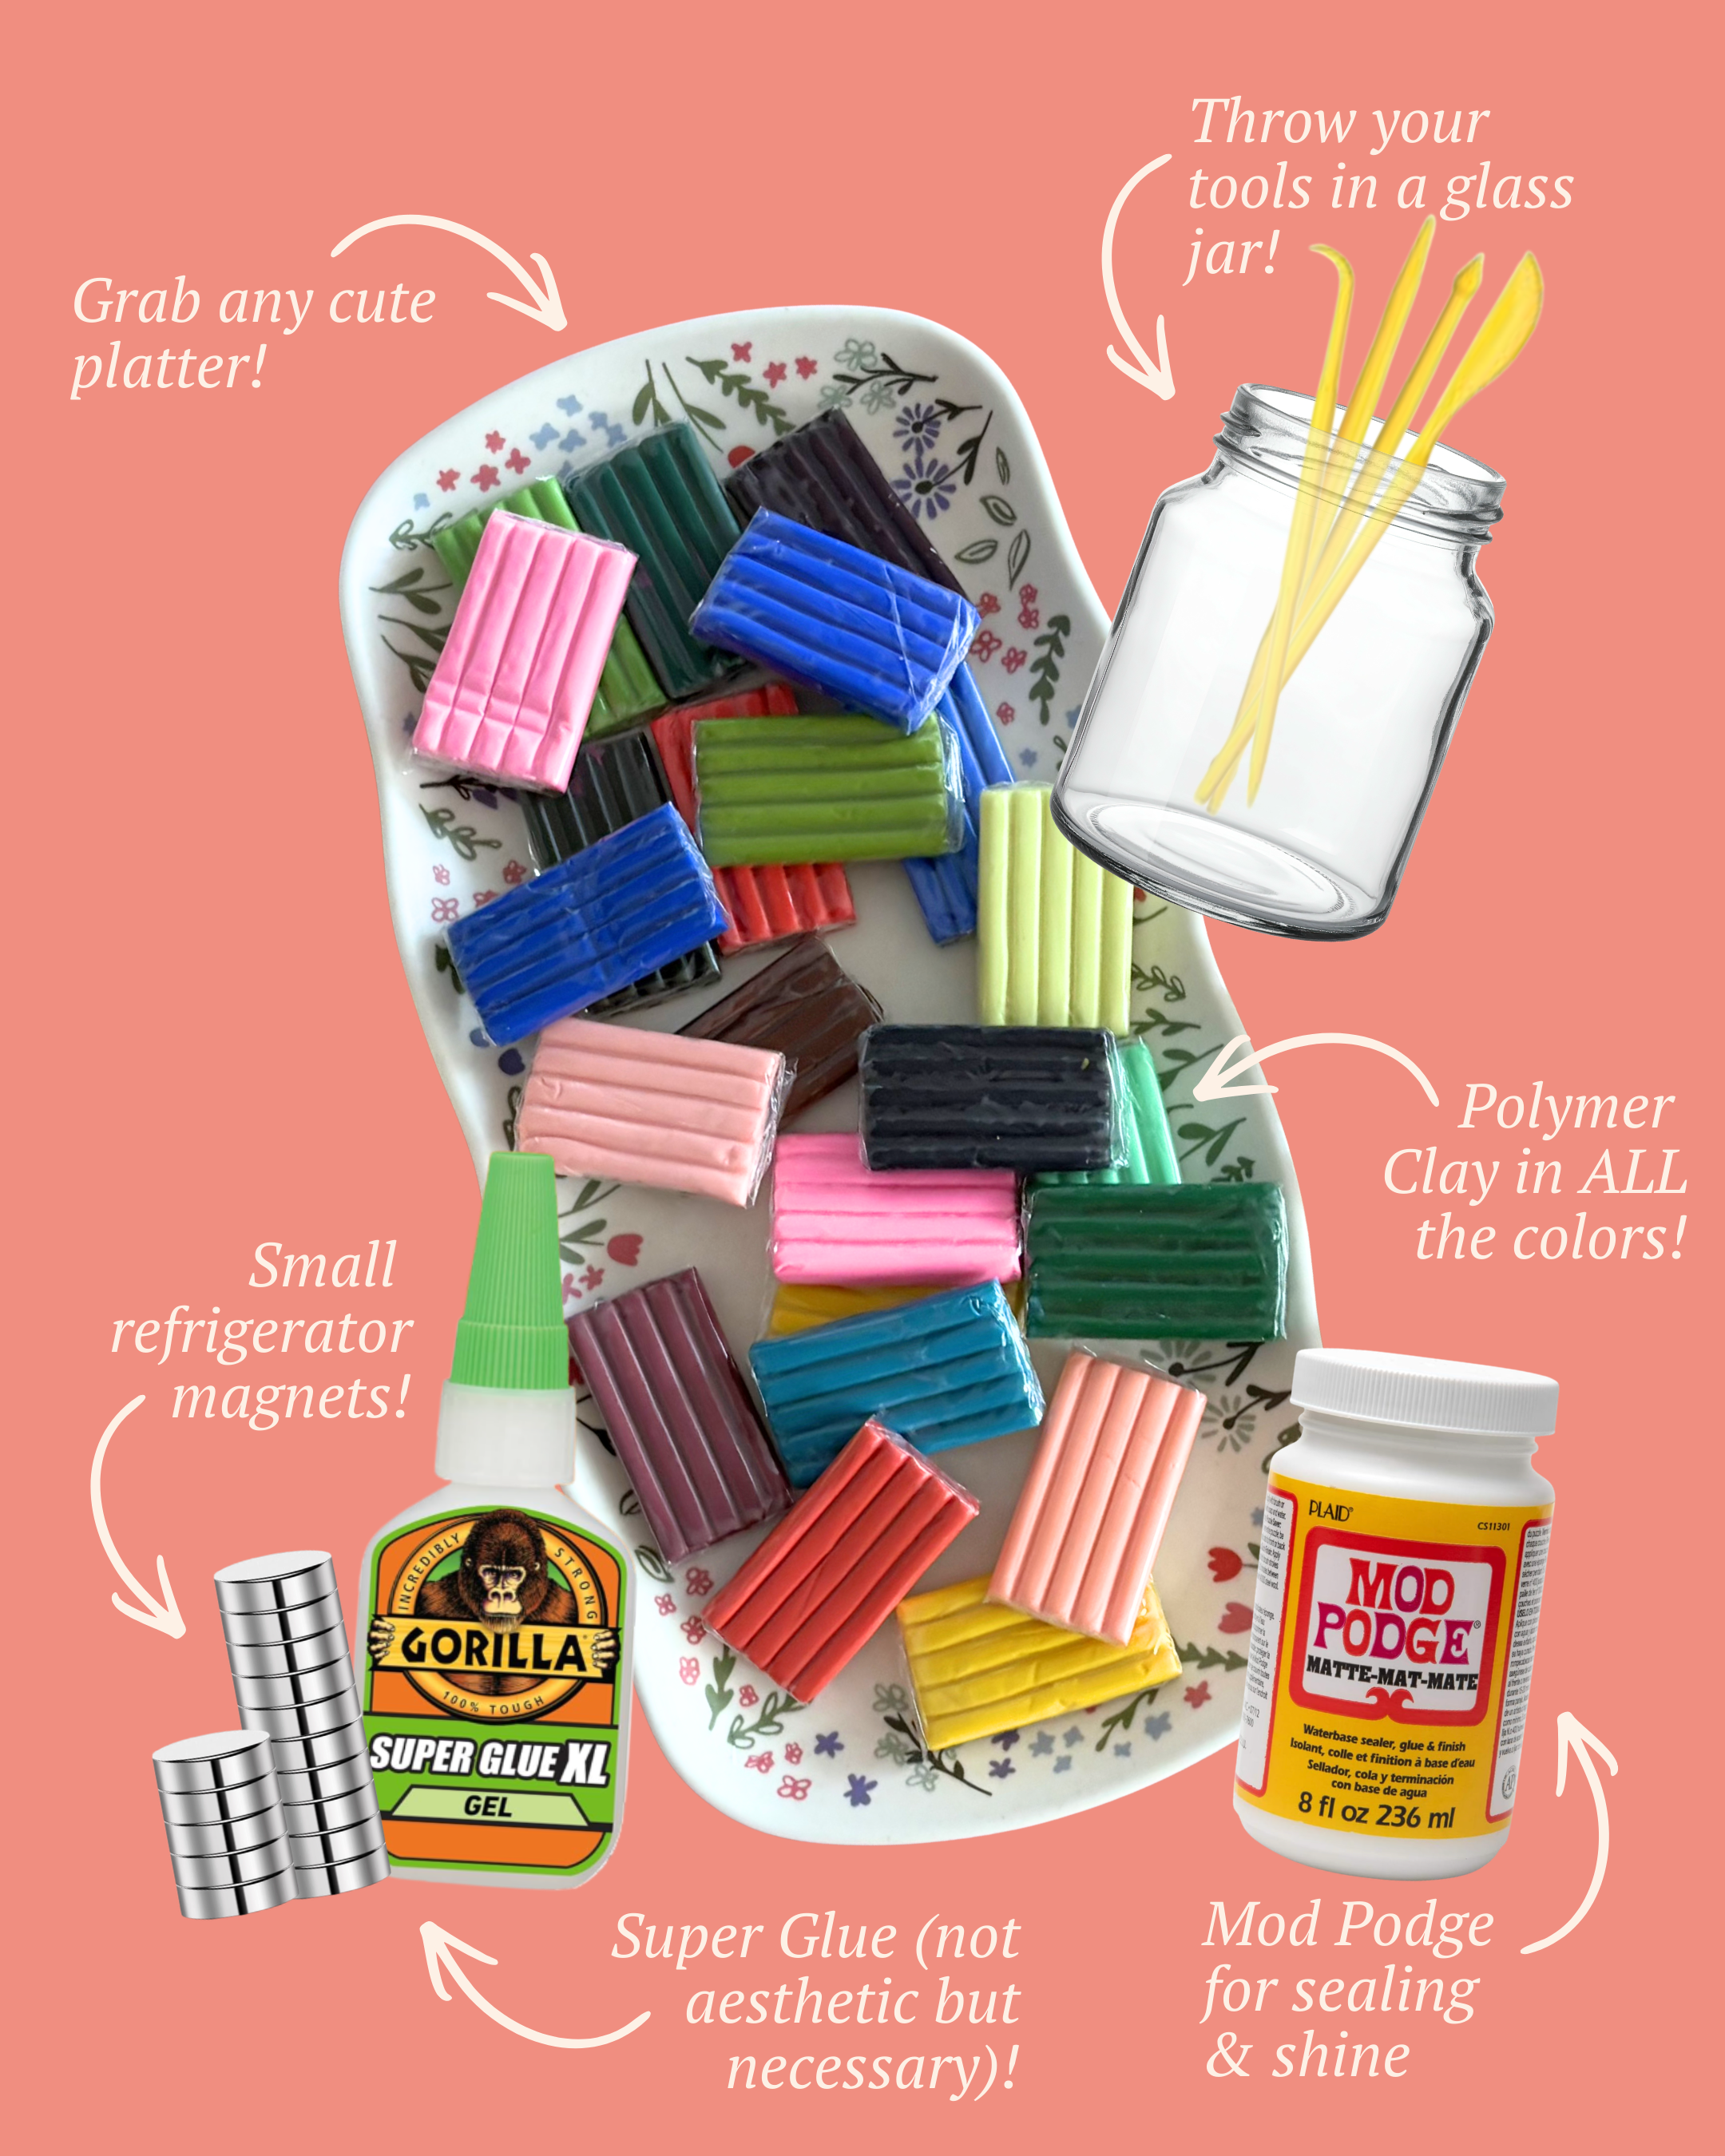
I am sure there are a million products and combinations of products that you could purchase for this craft but after some research here is what I bought!
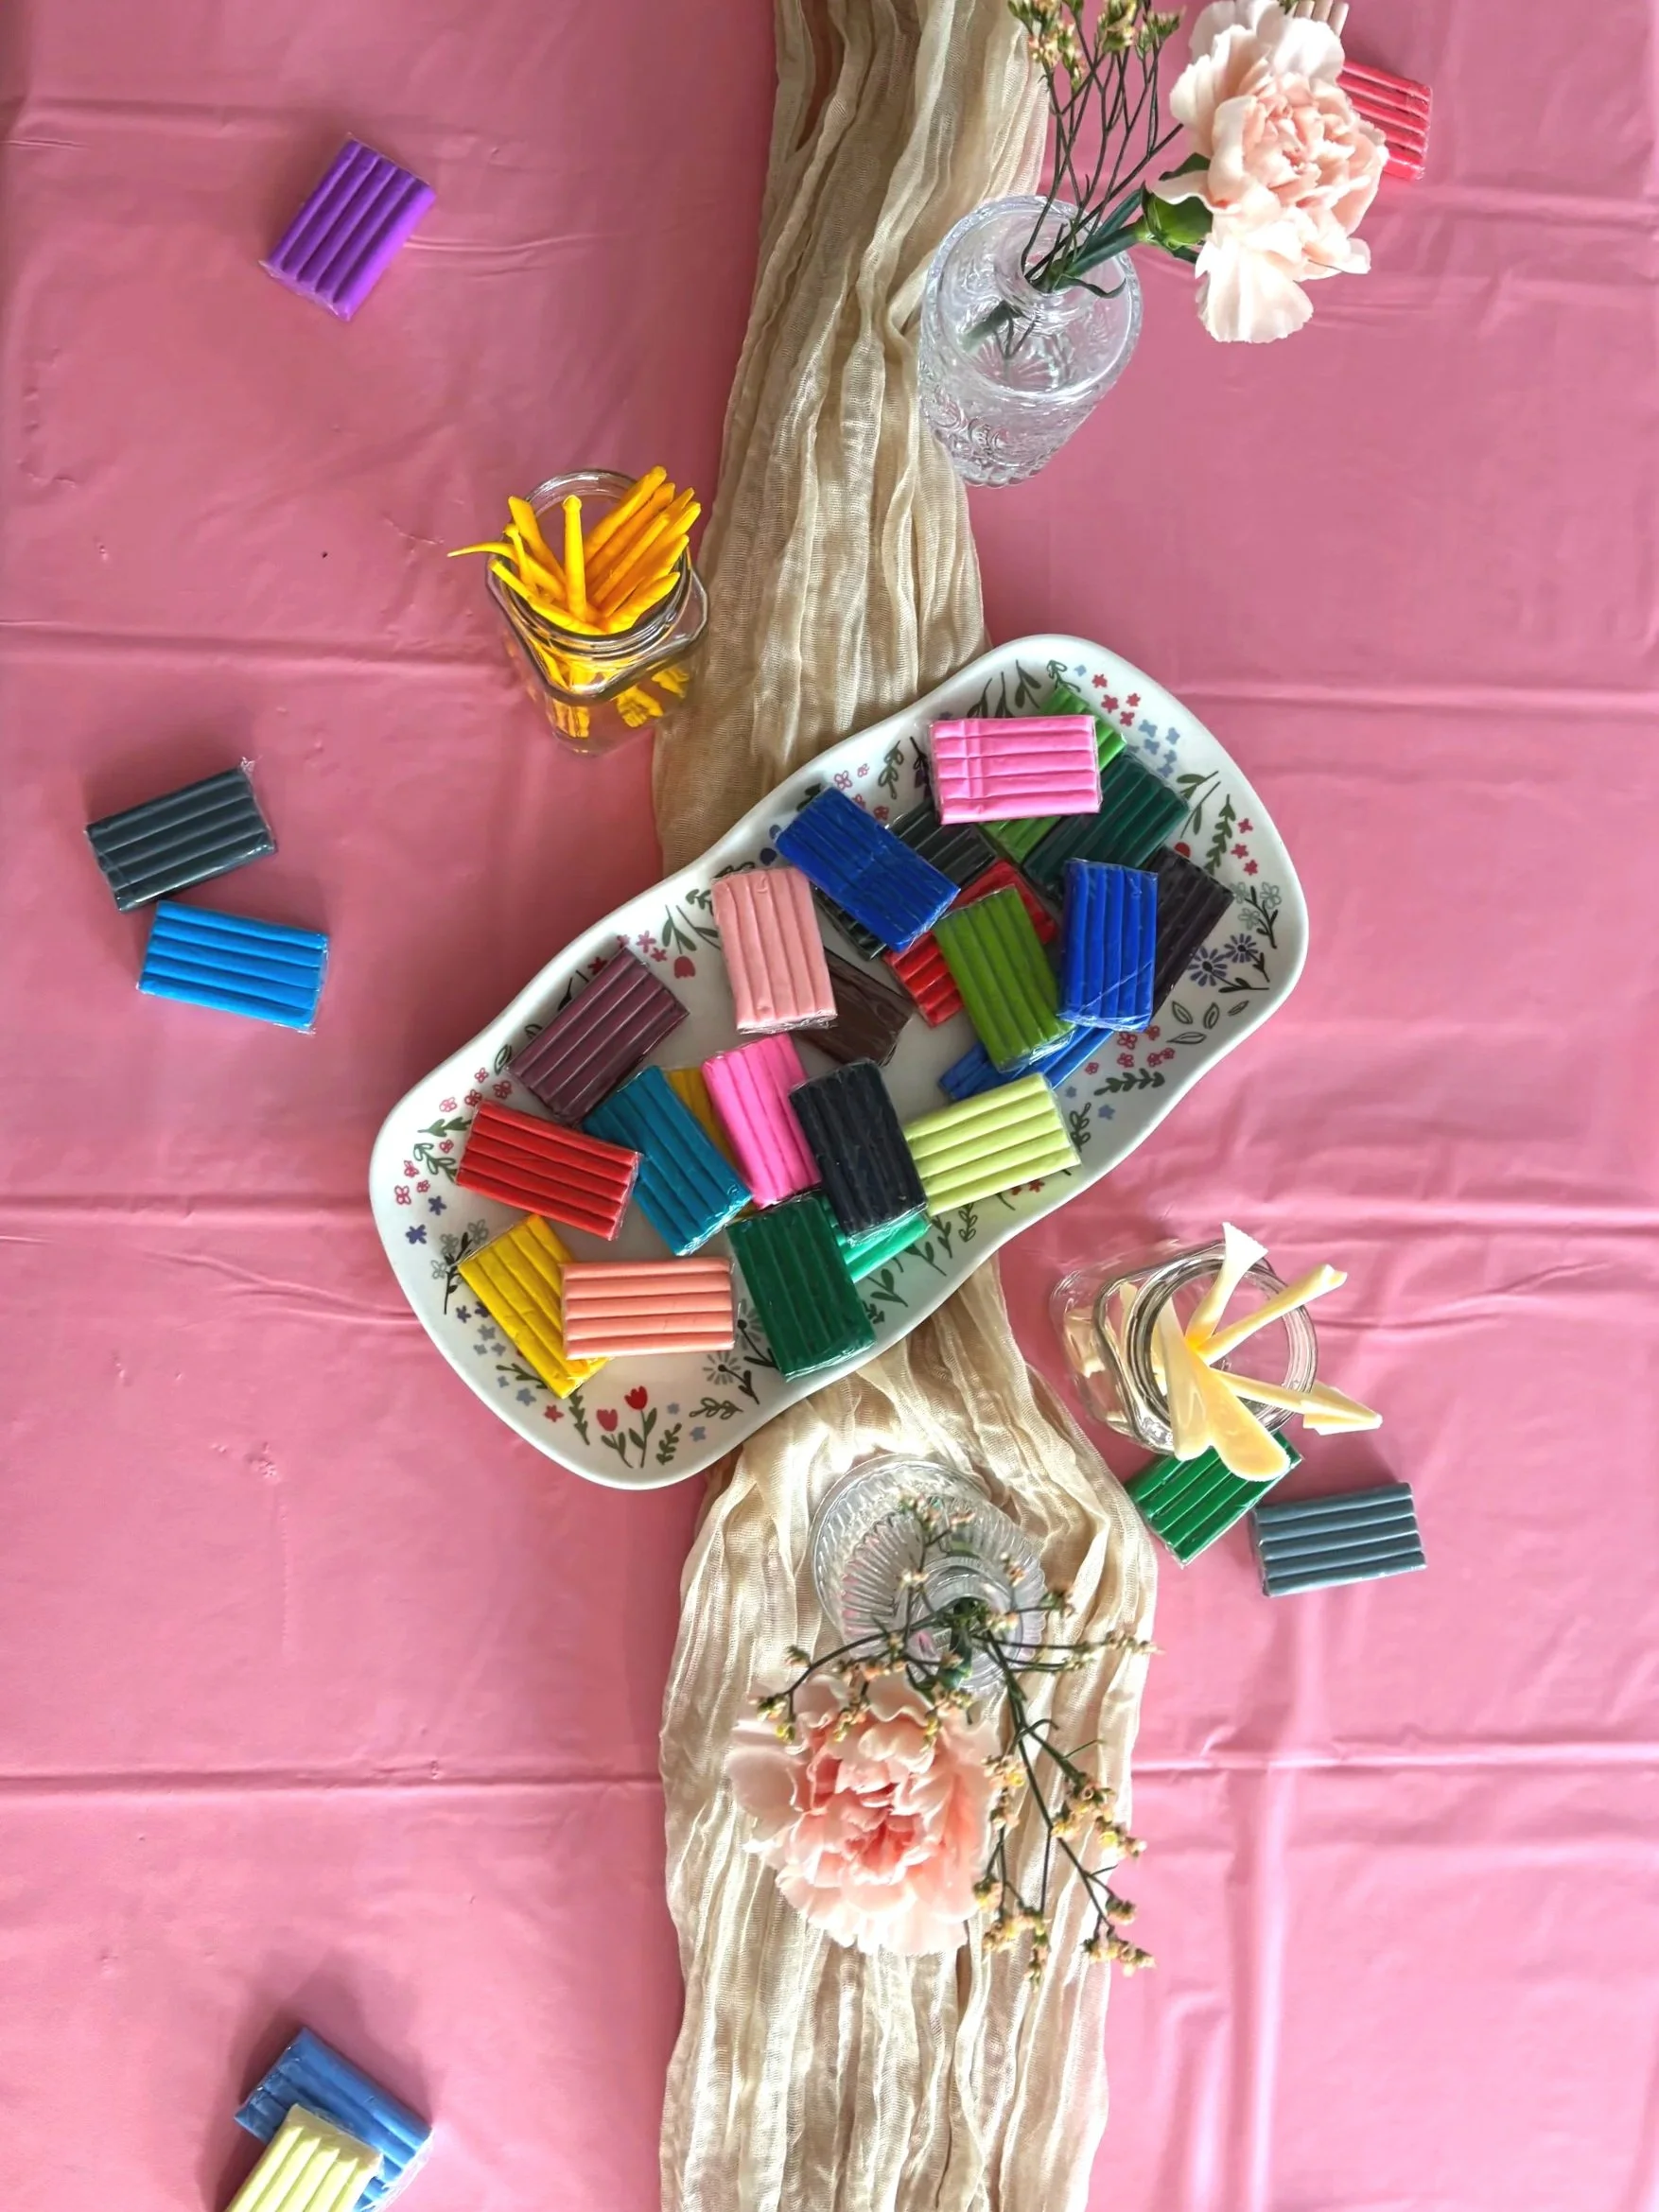
This polymer clay craft kit! There were so many brands and different kits out there. I chose this one because: (1) It had so many different colors of clay so I didn’t have to buy clay and paint and paintbrushes; (2) It included so many different tools! You could definitely go without the tools and get creative but they actually proved to be incredibly helpful; (3) The quality of the clay! I read through reviews of a lot of different kits and many had poor quality, crumbly clay. I will say, the quality definitely varied amongst the different colors but overall I was very impressed!
Small, but strong refrigerator magnets! I liked these particular magnets because they were pretty small but still strong. The small size meant that they fit even on the smallest of clay-designs!
Warning: If you have small children or pets, be very careful having these out! They are definitely a choking/swallowing hazard! We have cats and made sure to put them in a different room.
Super Glue! I know this one seems obvious but…super glue is a necessity. I have actually done this craft multiple times and (confession) the first time I attempted to use hot glue because I didn’t have any super glue. This. Does. Not. Work. (And it is dangerous!) Within minutes, the magnets were popping off of the clay. So, super glue is definitely a necessity!
Mod Podge! Technically you can go without the Mod Podge but I think that would be a huge miss. Adding a layer of Mod Podge made for the perfect, shiny layer to create a finished, almost professional look! I already had a sponge brush to apply the Mod Podge with, but you could probably use a regular paint brush as well.
A baking sheet & parchment paper! Hopefully you already have these on hand, but these are necessary when using polymer clay because you have to bake them (Note: you can use air dry clay if you want to skip this step, but then your guests will have to wait to finish their magnets another day, so I don’t recommend).
Some bonus items (not necessary):
Glass jars! I grabbed some small glass jars I had lying around the house to put the clay tools in. While not necessary, this made for the cutest tablescape and made the tools more visible for everyone at the table.
Platters! Using a couple of platters to put the clay on was absolute perfection. I literally just grabbed some trays I had lying around the house and it elevated the look of everything exponentially!
How to make the clay magnets:
There are a lot of different methods and instructions out there for how to make these clay magnets, so I am going to specifically focus on how I tried to make this as user friendly as possible so that none of my guests felt left out (while also giving you all the necessary information for making them of course):
Preparation:
Let your guests know what they will be doing beforehand! I liked letting my guests know what we are going to be doing ahead of time. This allows them to get excited, to set expectations, and (if they’re type A like me) to start preparing! Some of the girls probably skimmed right over the text I sent letting them know what we would be doing, but some of the girls got so excited and started planning what they wanted to do.
Prepare some inspiration! One thing I wanted to avoid at this girls night (because I have seen it happen before) was all of us coming to the table after chatting it up with our charcuterie, sitting down, and immediately all opening our phones to find a picture of what we want to do. To avoid this, I took a few minutes the week prior to throw 15-30 images and ideas onto a Pinterest Board. Then, the night of, I set up my iPad on the table so that girls could look through it and find some ideas! This turned out to be so fun because instead of all the girls looking at their phones in silence, it became a communal brainstorm session. (Note: Next time, I would print out ideas to eliminate as many screens as possible.)
Lay out your supplies! I have already talked a little bit about this one, but incorporating the craft supplies into the tablescape turned out so cute and saved me time as a host in the long-run so I wasn’t running around trying to pass out clay, tools, and magnets instead of spending time with my girls!
Give a quick rundown! Walking into the night, I definitely didn’t want to assume anyone had watched as many Reels about polymer clay magnets as I had (lol). So on the front end, I gave a quick rundown (the basics: grab what clay you want, mold it with your hands and tools, we’ll bake them, then super-glue the magnets on and add Mod Podge). Also remember your guests aren’t dumb, you don’t have to over explain and micromanage (though maybe those are just my struggles). I did make sure to show them the size of the magnets so that no one created something too small that would not fit the magnet.
Creating the magnets:
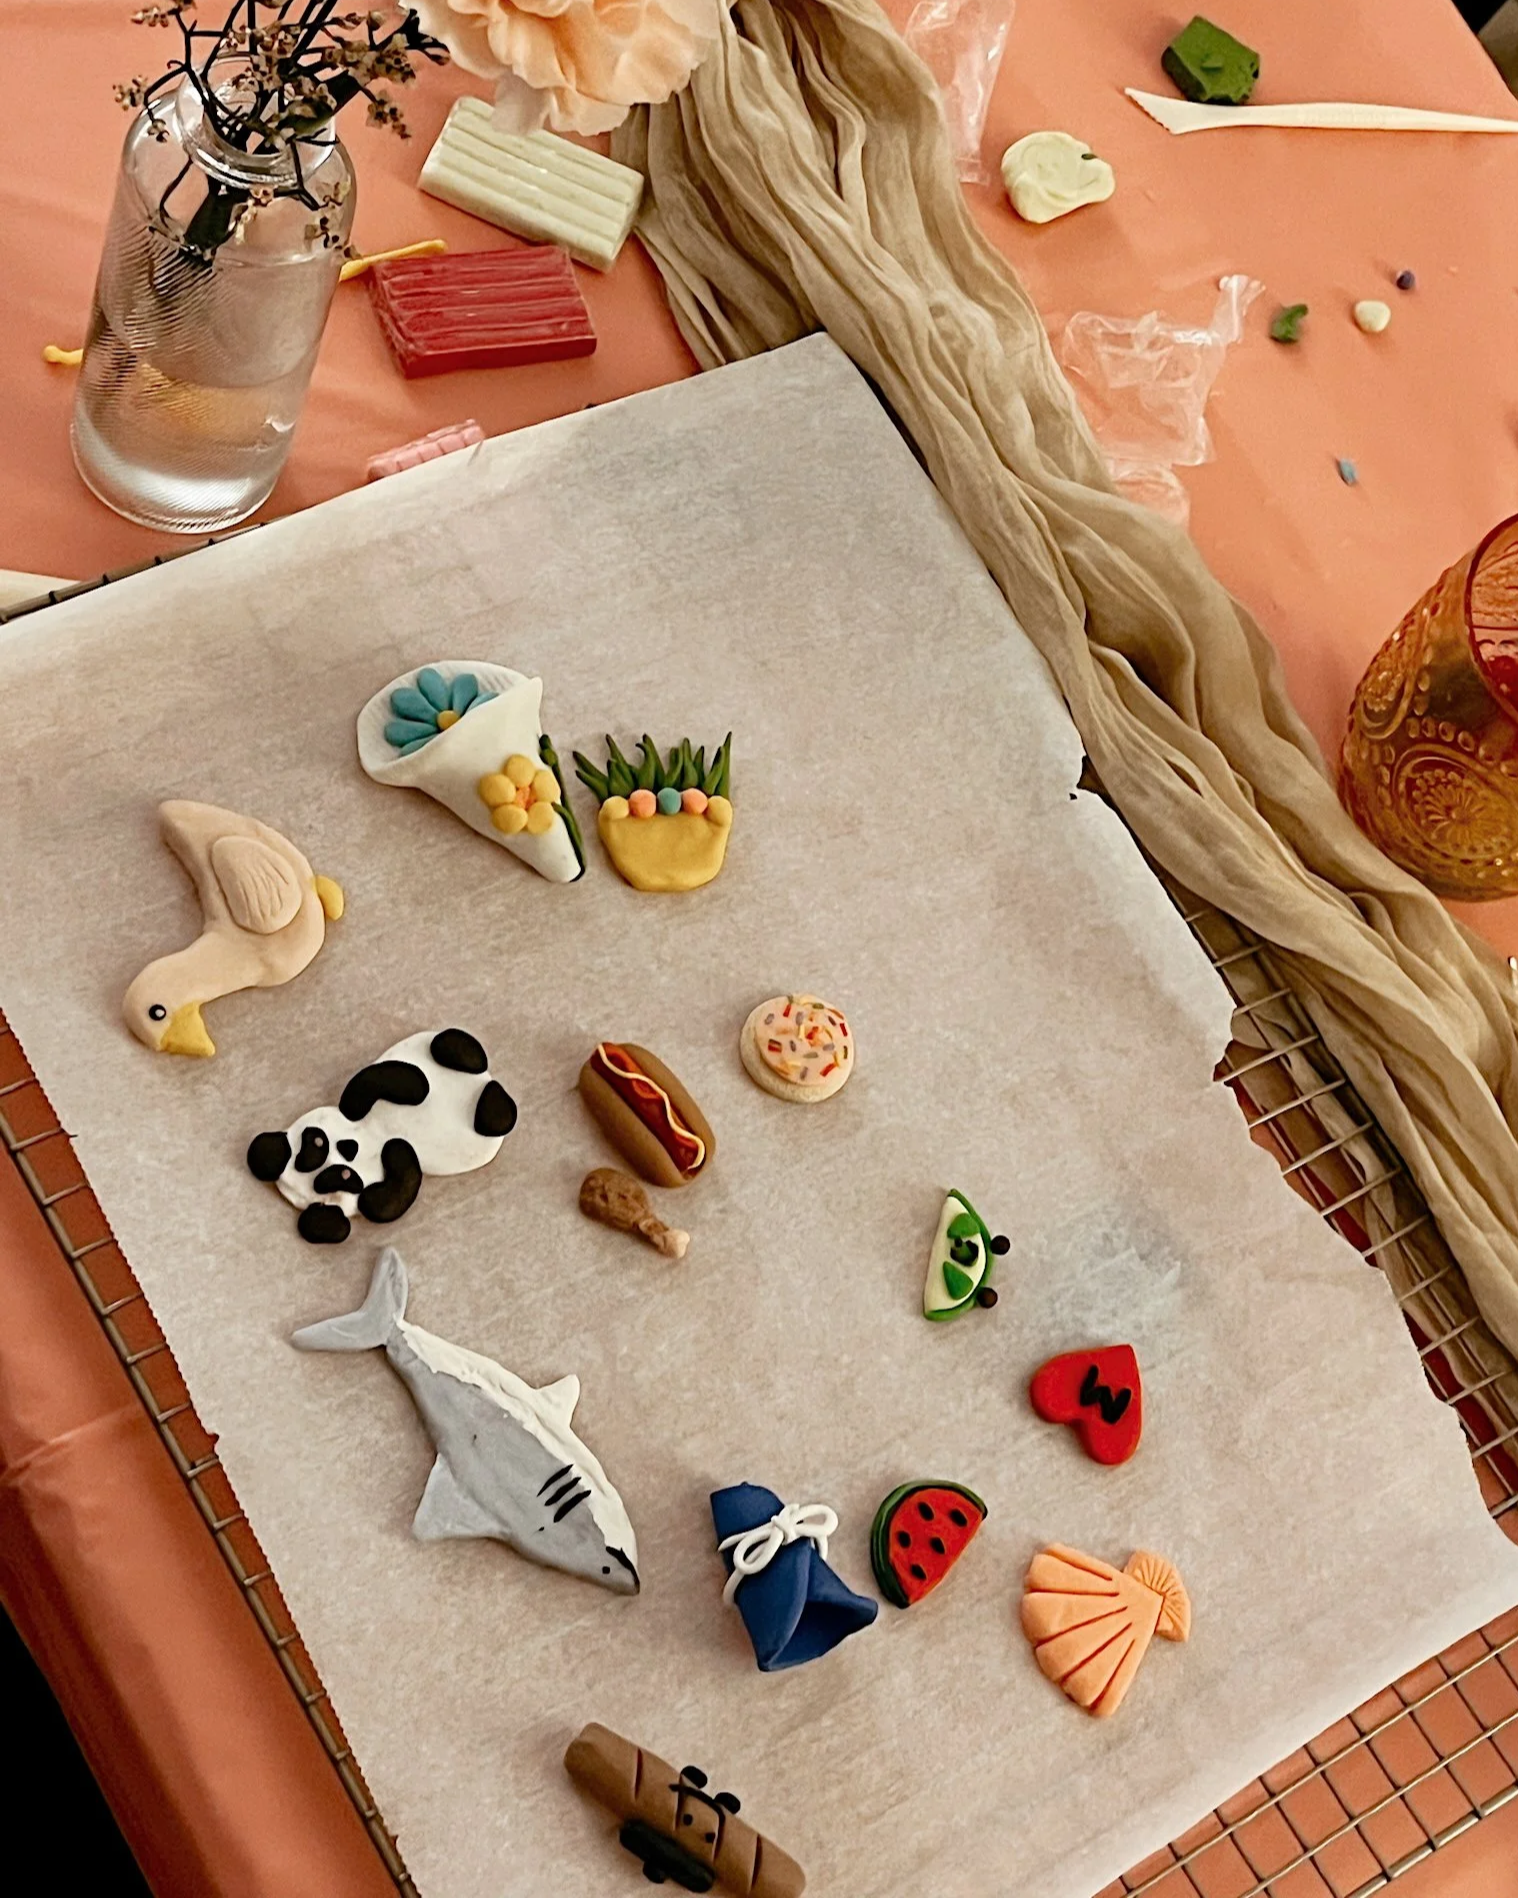
Create away! After grabbing our colors and our inspiration, chatting and crafting was such a fun experience. Whether it was oohing and aahing at someone’s gorgeous design our laughing together at someone’s flop, this was the most memorable night. We made so many different designs, chatted about everything from love to tv shows to fertility (I don’t know…we’re girls, okay…). Having done so much prep work on the front end meant that as a host, I wasn’t running around, micromanaging, stressing about what everyone was doing, if they had clay, tools, or knew what to do. I was able to just craft alongside of the girls and enjoy the time we had together.
Put ‘em in the oven! Most polymer clay kits will have the instructions for this part of the process included so make sure to check the instruction manual for your kit. I put all of the creations on a baking sheet lined with parchment paper in a preheated oven at 275 (the instructions said 266 but I don’t have that fancy of an oven…) for 15 to 30 minutes (I leaned towards the 15 minutes side since my temperature was a little higher). This step seemed inconvenient to me at first, but it fell at the perfect time for us gals to revisit the charcuterie boards and go even deeper in conversation.
Let them cool & Mod Podge! After letting them cool for another 10-15 minutes, I let the girls choose whether or not to Mod Podge their creations. Most of us did and it dried so quickly!
Super glue the magnets on and gawk at your creations! After this, we super glued the magnets on and geeked out over what we had created! Hopefully supergluing is self-explanatory for you and your guests—just make sure to avoid fingers…
DIY Mocktail Bar
Lastly, as a little bonus (and because I had some extra time) I put together the cutest Mocktail Bar for the girls! I knew that we would have plenty of food from everyone bringing their own boards so I knew I didn’t need to make another charcuterie board. But, I also wanted to contribute a little something and add an extra element to our evening. Like I said, I wanted this to feel like the perfect mini getaway for these girls. The two major elements I focused on here were (1) the ingredients of course! and (2) the decoration and set up!
Mocktails 101

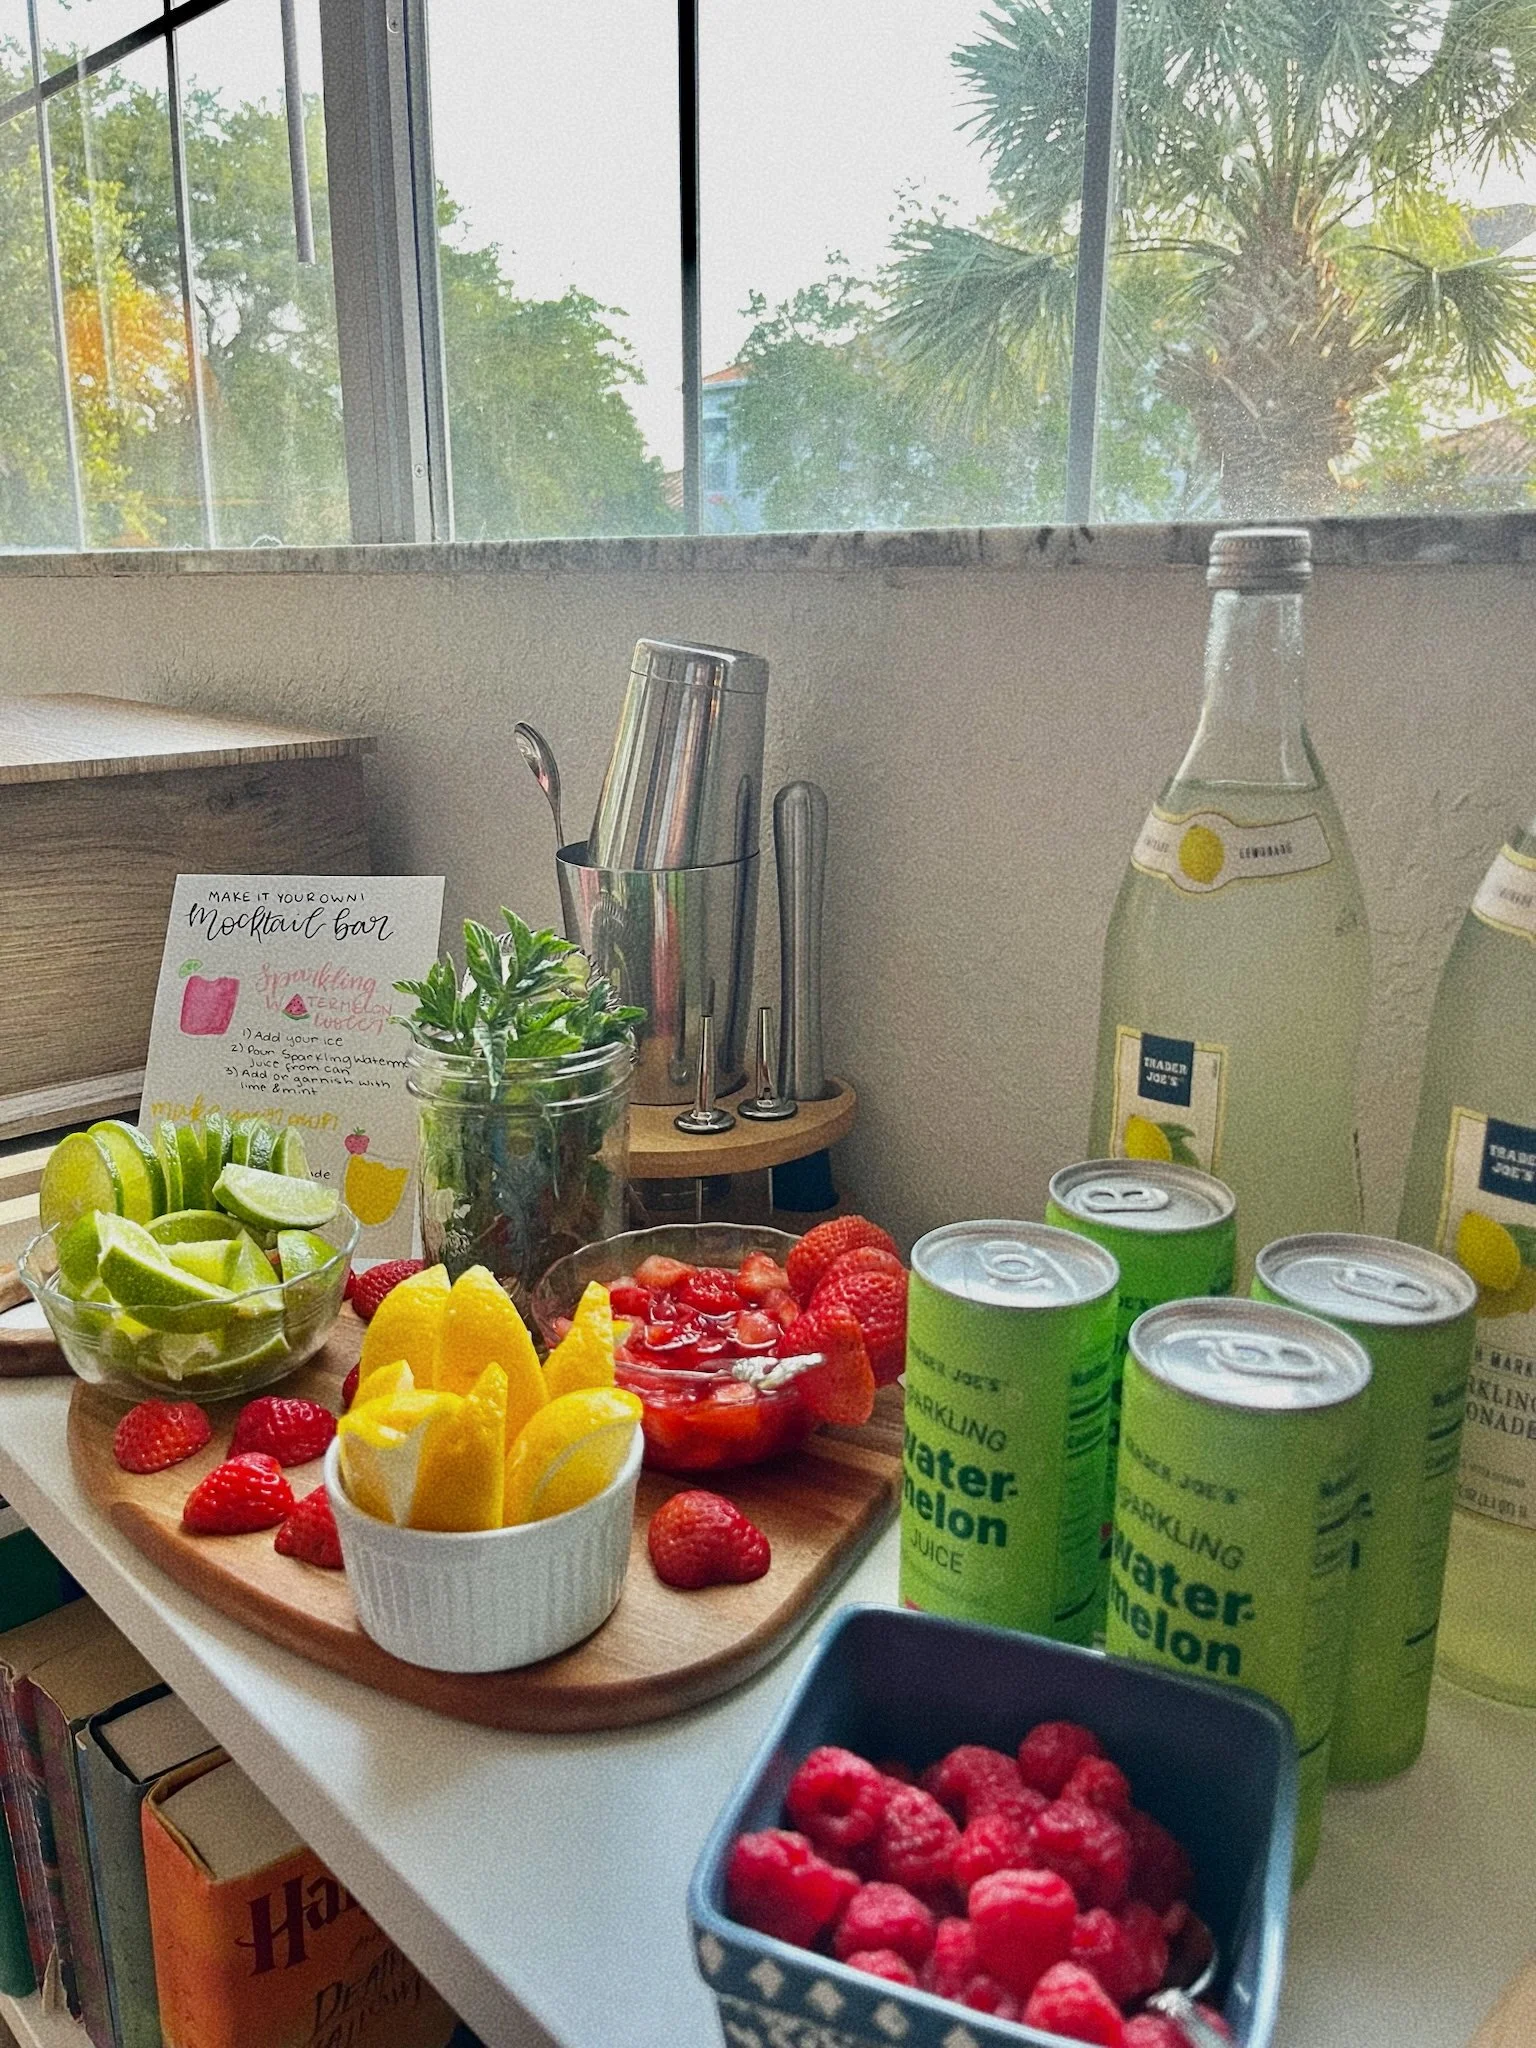
I love a good mocktail! I also think they are perfect for any kind of get-together because they are budget-friendly (guys…alcohol is expensive), guest-friendly (allows those who don’t drink to still take part), and (obviously) FUN! For this mocktail bar, I wanted my guests to have endless options of the kind of drinks they could create. I didn’t want to just create two flavor palates they had to choose from, but for them to have everything they needed to create what they wanted! So, I headed out to Trader Joe’s to get all my goods:
French Market Sparkling Lemonade! This is one of my all time favorites for parties and for myself. It tastes great by itself but is mild enough that there are endless flavor combinations that you could add!
Sparkling Watermelon Juice! I definitely was going outside of my comfort zone on this one but it paid off big time. This one, like the lemonade, tastes great by itself but wasn’t too strong making it another perfect base for mocktails.
Note: This is a TJ’s seasonal item for the summer. Another great base-option would be this Italian Sparkling Mineral Water.
Macerated strawberries! This was as close as I came to cooking for this event. A few hours before, I macerated strawberries using this method. I think next time, I would spend some more time and research how to make my own homemade syrups because this didn’t quite pack as much of a punch as I wanted it to.
Lemons, limes, strawberries, and raspberries! I think these all speak for themselves, but the key here was that I cut some of the lemons, limes, and strawberries so they could go on the rim of peoples glasses and left the others just to throw in or muddle.
Mint! That sparkling watermelon juice was simply begging for a mint garnish so I grabbed some fresh mint at Trader Joes. I mainly wanted the mint for garnish so all I did to prep it was wash it and smack it (I don’t know…look it up).
The Set-Up
For the perfect mocktail bar, the set-up is just as important as the ingredients! Here are the different elements I included!
A Mocktail Bar Sign! This was by far my favorite element of the whole set-up. This served as both an aesthetic element as well as an instructional one. Obviously girls were able to make their mocktail however they wanted, but I did include two options along with steps on how to make each. I was feeling particularly crafty so I used some watercolor paper and doodled the two options and hand wrote the steps.
I used one of these Table Number Holders to prop my sign up but any frame will work!
Bartender kit! This totally isn’t necessary (but neither is a mocktail bar!) but it really added to the look and the overall fun of the mocktail bar! We had so much fun pretending we knew how to mix up drinks. I have the exact one I linked and it is so perfect and easy to store.
I used a charcuterie board like this one to lay out my macerated strawberries and fresh produce.
On top of this I used a mix of mason jars for the mint and ramekins for the lemons and limes.
I did not have this, but something I would LOVE the next time would be a cute ice bucket for keeping the ice cold and serving it. Something cute and functional like this one on Amazon would have been perfect.
Hosting tips for a fun and stress-free girls night
Whether it is charcuterie boards, clay magnets, and mocktails or just some simple board games and tea, girls nights are a great way to invite people in and build community wherever you are at. While I think I have given a lot of tips throughout this post, here are some last-minute (very practical) tips when it comes to a girls night:
Have the perfect playlist! I think music really sets the vibe of the night as soon as your guests come in. Having a more refined wine and cheese night? Maybe consider some high-class jazz. Just pulling out some board games for a casual evening in? Maybe throw on some of your recent favorites. For this night in particular, I put together this playlist on Spotify (feel free to steal it) complete with some crooner classics and Rom Com soundtrack throwbacks.
Have a plan but don’t stick to it… I know this one sounds crazy coming from me, the type A, micromanaging girly that I am, but hear me out. I think having a plan is necessary because you want guests to feel this is a space you have created intentionally. Not having a plan leads to confused guests and…let’s face it…awkwardness. However, what I have observed is that as the night goes on and people get more comfortable with one another, your guests will begin to feel free to do what they want to do. If that means sitting and yapping around the charcuterie boards instead of getting to the magnets right away or making a couple rounds of magnets instead of just one, don’t let your plan confine your guests to your expectations. They aren’t consumers, they’re your community!
Have. Fun. Don’t get me wrong, I think it is important to serve and love your guests (that’s what I am all about), but if this gets in the way of you enjoying the night and deepening your relationships with your guests, then you’re doing it wrong my friend. Once again, your guests aren’t consumers! They want to love and serve you too. Strawberries need restocked at the mocktail bar? Don’t rush to cut more, stay focused on the person in front of you. Ran out of paper plates? Keep making magnets with your friends. Enjoy the night and remember that you are a part of it.
I hope that this inspires you and gives you the tools to host a girls night of your own! Let me know if I should post some more of these ideas or go into depth about any of these particular elements! Keep hosting!